 |
Changing the color of guides, grids and margins
Altering the magnetic range of ruler guides and grids
Hiding and displaying guides and grids
Displaying guides and grids above or below other elements
|
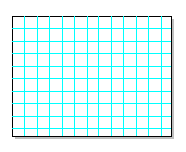
Rulers, guides and gridsTo help you produce consistent layouts, and align items, text, graphics and content accurately, Freeway provides various rulers, guides and grids: · Rulers along the top and left-hand edges of a window reflect the vertical and horizontal offset of your items. · Ruler guides are vertical and horizontal guides that you use to place and align items accurately in conjunction with Freeway's rulers. They're especially useful for 'one-off' alignments particular to an individual page. · Vertical and horizontal grids are the easiest way to control your basic page and item layout. For example, you can divide a page into rows and columns, separated by set amounts of space (gutters), and snap boxes to them. · Margin guides help you visualize the 'white space' around the edge of a Web page, which you'll usually want to leave free from text or graphics. However, it may not be necessary to create margin space on your Freeway pages as the Web browsers add space when they display the page. You may want to omit margins on your Freeway pages and view the effect in a variety of Web browsers. You can also preview the browser margin by turning off the Clip Background option in the View menu. RulersFreeway's rulers, along the top and left-hand side of the document window, give you an indication of the position of items on a page with respect to the ruler origin. To begin, with the ruler origin is aligned with the top left corner of the page, but when working in a particular area of the page you may wish to move the ruler origin in order to work more conveniently there. The ruler display varies with the selection on the page. For example, with an item selected, the horizontal ruler reflects the standard origin, but with the text cursor in a box, the horizontal ruler reflects the text margins of the item. You can: · redefine the ruler origin · hide and display the rulers. Hiding and displaying rulersYou can display or hide the rulers along the top and left-hand side of the screen. Rulers are displayed by default when you open a document. Choose View/Rulers to remove the rulers from the window and expand the page area. Choose it again to display the rulers. Setting the ruler originYou can alter the position of the ruler on the page by repositioning the zero point or changing the ruler origin. This affects the whole document not just the page you're working on. The current positioning of items on the page is not affected by changes to the ruler origin. To set the ruler origin, ensure the rulers are visible, and: 1. Move the pointer over the ruler origin icon at the top left corner of the window where the horizontal and vertical rulers intersect. 2. Hold down the mouse button and drag the pointer onto the page. A long crosshair shows the position of the new ruler origin. 3. Release the mouse at the new origin. To reset the ruler origin to the top left corner of the page once you're done: · Double-click the ruler origin icon Ruler guidesFreeway allows you to set up guide lines to help you position items when laying out a page. These lines can be visible as you work, or hidden, but they are not published to your Web pages. You can make objects snap into alignment with ruler guides. Placing a ruler guideRuler guides are denoted with light green lines by default However you can change this permanently to a different color of your choice in the Grids/Guides panel of the Preferences dialog box. To place a ruler guide on a page: 1. Make sure that the rulers are visible along the top and left-hand edges of the window. If they are not, choose View/Rulers. 2. Make sure guides are visible by ensuring that View/Guides is checked. 3. To place a vertical guide, point at the ruler along the left-hand edge, hold the mouse button down and drag the pointer onto the page. To place a horizontal guide, point at the ruler along the top edge, hold the mouse button down and drag the pointer onto the page. A solid black line indicates the current position of the guide as you drag. 3. When you reach the position you want, release the mouse button to place the guide.
Changing the color of guides, grids and marginsThe default color for ruler guides is light green, and light blue for grid lines. You can change the default colors for these if you want: 1. Choose File/Preferences. 2. Click on the Grids/Guides icon. 3. If you want to set independent horizontal and vertical guide colors for ruler guides, uncheck the Link box. 4. Click on the Guides, Grids or Margins color selector to display the Color Picker and select another color. 5. Click OK to confirm the color and then click OK to confirm the dialog and return to the document. Moving a ruler guideThere are two ways to move a ruler guide to a new position on a page: · Using the Selection tool, drag the guide to the new position, then release the button. · Double-click on an existing ruler guide to display the Guide dialog box. Type in the numerical position (this is an offset from the ruler origin) where you want to place the guide and click OK. When you try to move a guide, you may select a nearby frame or rule instead. If this happens, try dragging from somewhere else along the guide first. If this is not easy, you may need to change the display so that the guide is displayed above the items on the page instead of below. Choose View/Guides Above. If you want to drag a guide off the visible part of the page, and have the view scroll to follow it, hold down the Shift key as you drag. Removing a ruler guideTo remove a ruler guide from a page: 1. Using the Selection tool, drag the guide off the page and out of the document window. 2. Release the mouse button.
Snapping to guidesYou can make the non-publishing guides magnetic throughout a document, so that when you move the edge of a frame or the end of a rule within a certain distance of a guide or gridline, it snaps into alignment. Snapping to guides is on by default, but you can turn it off if necessary by choosing View/Snap to Guides. Altering the magnetic range of ruler guides and gridsGuides exert a magnetic pull on boxes and other objects on the page which can be useful when you are resizing items or aligning other guides. You can alter the range over which guides exert their magnetic pull. This is set to 5 pixels by default for both guides and grids, but can be changed using the Preferences dialog box: 1. Choose File/Preferences. 2. Click on the Grids/Guides icon. 3. Enter a value in pixels in the Magnetic range text box in either the Guides cluster or the Grids cluster. 4. Click OK. Hiding and displaying guides and gridsYou might find it useful to hide the guides and grid lines while you're working on a document. To do this, choose View/Guides to turn them off. The non-publishing guides are then hidden from view throughout the document. However, guides and grid lines still exert a magnetic pull, even when they are invisible. To display them again, choose View/Guides once more. Displaying guides and grids above or below other elementsYou can display guides and grid lines above or below the other elements on a page. For example, if you display guides above other elements, it's easier to move them without selecting other elements by mistake. To change the display position of the ruler guides, choose View/Guides Above. GridsTo help you position frames and rules consistently, you can set up horizontal and vertical grids of regularly-spaced guide lines, which divide pages and frames into rows and columns (with gutters, if necessary) You can apply these grids to a page, or to the whole document. If you apply them to a page, you can specify a start and end point as an offset from either the page's margin guides, or the edge of the page. Setting horizontal and vertical gridsTo apply a horizontal or vertical grid: 1. Select a page or frame. 2. Choose Page/Grids 3. From the Apply to popup menu, you can choose whether you want the grids to apply to the current page or the whole document. 4. Turn on the type of grid/s you want to apply in the relevant check boxes (Vertical and/or Horizontal). 5. For a vertical grid (i.e., a grid of vertical lines) enter the interval you want the vertical lines to appear at in the Width field. You may also specify the width of a gutter to be inserted between columns, and a left or right hand offset if you wish. For a horizontal grid (i.e., a grid of horizontal lines) enter the interval you want the horizontal lines to appear at in the Height field. You may also specify the width of a gutter to be inserted between rows, and a left or right hand offset if you wish. 6. You can apply them across a whole page, or just between the margins, if you have set these using the Document Setup dialog. Click From Margins to apply to the area between the margins. 7. Click Apply to set the grids and leave the dialog box open, or just click OK if you're happy with the settings. The grids you specify are placed over the page. Vertical and horizontal grids are shown in light blue. You can display them in a different color if you want.
Note: If the new grid doesn't appear, check that Freeway is set to show grids. Use View/Guides to display the grid. Removing gridsTo remove an existing grid: 1. Select the page or frame. 2. Choose Page/Grids. 3. Uncheck the relevant grid box or boxes. 4. Click Apply. Note: This returns the other options in the Grids dialog box to their default settings. Margin guidesYou can define margins for pages in your document when you create a new document in the Document Setup dialog box. The margins can be changed by redisplaying this dialog box using File/Document Setup command. |
|||

Back to the top |
|||